2013年1月10日 星期四

SpinFire 10.5新版上市

SpinFire 10.5新版上市


SpinFire10.5正式上市,可支援英文、法文、德文、日文、韓文、捷克文,簡體中文及繁體中文。更新項目如下
SpinFire 10.5 contains the following updates:

。5 new conversion outputs for our CAD2CAD* feature:

。ACIS
。IGES
。Parasolid
。PRC
。STL
。The tree control issue that caused poor performance for users without internet connection has been fixed

* Just a reminder, please note that the CAD2CAD function is a paid feature. Customers will have to purchase this option.


This feature should work with your reseller license, however, if you find that it is not available (ie greyed out), pleasecontact your Regional Sales Manager and they can update your license.

The SpinFire 10.5 help pages are still a work in progress and not yet live to the public until the general release, so you will have to use the following login information to access the pages:


User Name: actifyreseller

Password: r3s3773r

For the release notes of SpinFire 10.5, please go to the following location on the help site:
http://help.actify.com/display/SF100/SpinFire+10.5+Release+Notes

For information on the CAD2CAD function, please go to the following location on the help site:
http://help.actify.com/display/SF100/CAD+Format

Here are the links for SpinFire 10.5


●Single File Install:  For multiple Network Installations

●Web Install:  Downloads components from the internet
●Reader Install:  For only the Free Reader component. No license required.

The update to SpinFire 10.5 will not go live on the website and to customers until Friday, 4 January so as to provide you with time to fully test out the product before it is available to customers and prospects. As always, this date is dependent on any issues that are reported by you during this prerelease period.


為您選擇最好的公差分析軟體: CETOL 6σ

為您選擇最好的公差分析軟體: CETOL 6σ


為您選擇最好的公差分析軟體: CETOL 6σ

公差分析計算是每個產品設計必做的功課,利用公差分析的計算我們可以預測產品公差的累積,並預估產品組裝後的狀態及良率,做好公差分析的工作,產品將可以減少開發的成本及提升產品的品質。


正確的公差分析計算流程:

1.了解產品原始設計的特性及狀態
2.根據客戶的規格或設計的要求來進行有效的調整
3.找到關鍵的尺寸公差及問題點並予以控制。


一般的設計者缺乏有用的公差分析工具,因此只能用簡單的Excel表格來計算(Worse Case & RSS),但這樣的計算方法有諸多的限制,且不能找到真正的問題點。這是因為Excel的計算僅僅只能累積單一方向的公差,但實際上的產品設計及組裝是同時涉及到X,Y,Z三個方向,這個三方向會互相影響並造成定位,旋轉等等效應。


CETOL 6σ 可直接與CAD系統整合(Pro/E, SolidWorks, Catia),設計者可直接在CAD軟體上直接對模型進行點選並進行公差分析的設定,透過組裝自由度的概念,設計者只要能夠掌握組裝的方式及流程便能輕鬆的做好設定。

CETOL 6σ的特點:


1.直接與3D CAD軟體整合,設計者利用熟悉的CAD軟體便可進行設定分析
2.利用組裝及標尺寸的的概念便可完成設定
3.可確實找到關鍵的尺寸及公差值
4.可利用動態模擬找到可能的問題點

彩原科技提供完整的公差分析解決方案,包括基本的公差分析訓練課程,進階的Excel表格軟體,3維公差分析軟體等等。歡迎您洽詢彩原科技來為您做更進一步的介紹及說明。


Get your design right the first time!

Get your design right the first time!

Get your design right the first time!


您是否有以下困擾?
1.每次修模費用都非常昂貴且龐大?
2.Project時間太趕,根本沒有時間做開模前的檢查?
3.趕著出圖,結果開模後又發生問題需要設計變更,造成惡性循環!
3.部分Engineer 缺乏DFM的觀念?
4.想要建立一套機制來進行標準化的流程,加快Project的速度並減少錯誤
5.現有的檢查軟體(CAD)速度太慢

如果您有以上的問題,彩原科技推薦給您一套業界最專業且快速的軟體:DFMPro。 Geometric公司推出的DFMPro軟體內建100種以上的檢查規則,其中含跨了 組裝 / 塑膠 / 板金 / 加工等等類別的業界常用檢查規則,導入後可在最短時間內立刻開始上線使用。

無論是工程師或主管,僅需要在設定好規則內容的數值之後,馬上就可以在CAD模型上進行檢查並快速獲得結果,並可產出多種格式的報告。


DFMPro的優點:


1.直接與CAD軟體整合,設計進行中便可隨時檢查 (Pro/E / SolidWorks / NX)
2.可立刻導入,不需要複雜的學習過程
3.可產出各種格式的報告,其中包括 3D eDrawing格式的報告,節省制做報告的時間
4.檢查速度非常快,並可同時檢查多項規則,可有效的縮短檢查時間並增加檢查的品質


歡迎您洽詢彩原科技來為您做更進一步的介紹及說明。


HDR Light Studio: What's New in Version 4 Now on PC, Mac and Linux

HDR Light Studio: What's New in Version 4 Now on PC, Mac and Linux


HDR Light Studio 4包含的所有功能和連線性,是可用第一次在 Windows、 OSX 和 Linux 的單一產品版中包括活的外掛程式。License是可用作為單機版或網路版。以下是功能介紹

LightPaint

新的 LightPaint 技術使照明演出者在呈現視圖中指示它關於他們的模型所需的確切位置的光點。削減到光 3D 場景所需的時間,使照明和思考的精確位置。LightPaint 已徹底改變我們照明工作流。沒有更多的試驗和錯誤和 re-renders 等待,只是即時的視覺回饋,作為您左右移動燈。LightPaint 需要猜測放輕......"湯姆畫家、 Bigman" HDR Light Studio 4 成為我預設照明解決方案後約 15 分鐘的演奏與 Beta 版......我愛放燈 '觸摸' 模型,它是如此的直觀和節省了大量時間。"Jim Cascarina,

New User Interface


●Faster and smoother interaction

●15% smaller footprint than version 3
●New selected light preview image
●Canvas Exposure Slider
●Interact directly with falloff curve
●Picture Light Browser previews under mouse
●Dynamic update of Zup/Yup setting
●A 'no canvas guides' option

FilmBack


Explore the shot with pan and zoom in LiveLight to light details using LightPaint


LightCam

Look through a selected light on the HDR canvas and use the camera navigation to drive its location


SunShade

Take control of the brightness of light sources in existing HDRI maps


Better connected than ever
New Direct Exporters
支援Modo, Cinema4D and 3DS Max


New Live plug-ins

支援Maya及 Houdini的 plug-ins


Who is using KeyShot-Lovaro Brings Fresh Visuals to Renault 4 Concept with KeyShot

Who is using KeyShot-Lovaro Brings Fresh Visuals to Renault 4 Concept with KeyShot

by Josh on December 26, 2012


凡概念汽車設計和汽車設計比賽是一毛錢一打,Lovaro 帶來一種不同的設計方法和新鮮的視覺效果,擴展其超越消費產品和現在的經典,與極具表現力,當代的暢銷車。由Allen Zadeh and Robert Foote創立于 2011 年,Lovaro 是一個位於Dumbo, Brooklyn屢獲大獎的、 跨學科的設計和品牌集團。雷諾收集雷諾 4 不斷重新設計比賽,與 Lovaro 之間的三名優勝者使用KeyShot 中的過程。


Fresh Visuals for the Renault 4


Looking back on the history of the Renault 4, there’s plenty of inspiration to be had. 50 years later with over 8 million units sold, Renault wanted to recapture the spirit of the versatile vehicle. With a focus on brand and experience, Lovaro delivered the Eleve, a design that is rich in its simplicity and beauty. On the visuals of the Eleve, Brett Dusing writes:

An understated approach is seen in even the small considerations for the Eleve, right down to its finish: It doesn’t have one.

“In auto design, people automatically reach for super glossy finishes. We don’t really believe that should be a given,” says Zadeh. Lovaro proposed new composite plastics for the exterior panels. “What’s interesting is that these materials look beautiful in their raw form. They don’t necessarily need to be painted.”


Lovaro was careful to tone down the veneer in the presentation of the design as well. The submission illustrations were rendered in KeyShot, a CGI application that gives computer design models the professional cosmetics of car ad photography. In this case, Zadeh kept its KeyShot output intentionally low key.


“Given this was a European audience, we didn’t want too much sheen on the renderings,” he explains. “We used reflectivity instead as more of an accent on the smaller features.”


Unlike typical car ad depictions, sensually lit body surfacing is not the center of attention in the Eleve renderings. Rather, ancillary features jump out. A faint blue emissive material inside the LED headlamps gives the car a clever blue-eyed gleam. Likewise, selected spotlights on a few crafted details bring out the car’s playful character. The viewer becomes drawn toward the interior features and starts to relate to the Eleve from within a more intimate space.


More details on The Renault 4 Eleve can be seen on the Lovaro website with details on the inspiration and competition.


lovaro-renault-4-keyshot-06
lovaro-renault-4-keyshot-01
lovaro-renault-4-keyshot-05
lovaro-renault-4-keyshot-04
lovaro-renault-4-keyshot-03
lovaro-renault-4-keyshot-02

讓"公差分析"驗證您的產品設計

讓"公差分析"驗證您的產品設計


產品的設計有許多需要驗證的地方,除了成品的檢驗及測試之外,其實在設計階段我們就可以開始進行一些重要的分析動作,以期能提前找出問題並避免製造後發生了問題,我們就必須付出更多的時間與金錢來修改挽救。而公差分析就是一個驗證設計值最好的方法。


由於零件製造時產生的誤差及變異量(俗稱公差值),可能會導致產品組裝後產生問題,一般設計者會在設計初期便做公差分析的計算來評估預期的結果,使用的工具往往是簡單的手算或Excel表格搭配Worse Case & RSS方法來得到大略的結果,但這樣的方法同是考驗了分析者對公差分析的了解程度,這些不夠熟悉公差分析的設計者只是為了做報告而做報告,無法真實的判斷出問題,因此也沒有辦法真正的解決問題。


彩原科技提供了完整的公差分析解決方案,其中包括:

1. 公差分析教育訓練:讓您快,,速了解公差分析的目的及意義,並開始正確的計算公差,找到問題。
2. 提供進階的公差分析工- MITCalc:進階版excel,讓您可以從公差分析的結果中獲取更多的有用訊息,包括結果的圖形分布,預測良率及控制製程能力 。
3. 3D公差分析軟體 - CETOL:直接與CAD軟體整合( Pro/ E,SolidWork ),設計者可直接利用3D Model進行公差分析,可快速得到最符合實際狀況的公差分析結果,可模擬真實的組裝狀態,真實反映出定位或其他旋轉偏移的公差問題,,並可以找出真正關鍵的尺寸並予以修正。


如果您對DFMPro有興趣並想做進一步的了解,歡迎您聯絡彩原科技,我們將會為您做更深入的介紹


DFM檢查最佳工具 - DFMPro

DFM檢查最佳工具 - DFMPro


由Geometric公司所開發的DFMPro軟體是業界公認最快速最有效率的可製造性設計檢查軟體。平均可節省設計者80%以上的檢查時間及30%以上的Rework費用。不僅可有效控制零件的品質,同時可加快產品開發生產的進度。
DFMPro內建100種以上的檢查規則,內容涵蓋了塑膠射出、板金、製造及組裝等等業界常用的檢查規則。使用者不需要浪費時間制定檢查規則,只需勾選需要的項目並填入數值,DFMPro立刻可以在幾分鐘內替您完成檢查的工作,有錯誤的地方同時可以取得量測的數據,因此只需要用滑鼠作簡單的點選,檢查者立刻可以得到需要的數據並進行判斷。


DFMPro可直接與Pro/E、SolidWork結合使用,不管是工程師或主管皆可以對3D Model進行最快速直接的檢查。DFMPro同時可以產生XML / Excel / eDrawing等三種格式的報告,可針對不同的需求提供不同格式的報告內容,加快您的工作流程。

如果您對DFMPro有興趣並想做進一步的了解,歡迎您聯絡彩原科技,我們將會為您做更深入的介紹。

Who is using KeyShot-Simon Williamson

Who is using KeyShot-Simon Williamson


  能量場的嗡嗡聲。尾鰭作為梁光爆破規定從航太器的微妙運動。顏色到你的思想和同樣的呼吸 — — 以深度的反映與完善每一個細節的最黑暗材料的切削運動的節奏壓碎。有很多,可以說出可以捕獲的看著它的Simon Williamson和更多的工作。他已經掌握了固定的捕獲想像的複雜感覺。他使用 KeyShot,使他生活中來的模型,我們談到他更他啟示、 他的過程和如何説明 KeyShot。   Simon Williamson
Modeling Software Used:
SolidWorks/Rhino

Originally from England, Simon’s focus has always been within the field of Industrial Design. He is a graduate of Newcastle Polytechnic (now Northumbria University) and hold a Masters in Design from the Royal College of Art. Before teaching full time, his range, professionally, included the design and manufacture of his own line of desktop, consumer goods; product development of toy concepts through to the prototype phase, (including major action-figure brands as GI Joe and Star Wars); as well as toy inventions. “Within this vast scope, I always maintained a high degree of detail, whatever the project, and thoroughly enjoyed making things, physically, which I believe gives designers an inside edge and depth or awareness to the many levels that define the multi-faceted realm of product design.


While working with frog design, in California, Hartmut Esslinger’s mantra was clear: “ideas are the notes, but model making is the orchestra”. Having always leaned towards this philosophy myself, I have employed elaborate models to test out ideas and it has given me greater insight into each and every phase of design. Of the many designers and artists that I admire, the one that stands above them all as far as inspiring me on a professional as well as personal level is Syd Mead; as an imagineer, his style and brand of futurism is most unique and smartens even the most mundane object. Now, as an Associate Professor at Wentworth Institute of Technology Department of Industrial Design in Boston (WIT.edu), I teach studio classes, 3D visualization and intermediate CAD. As a Professor, each day inspires me; working with students who are excited to learn and search out new opportunities is very rewarding and makes it all worthwhile!”
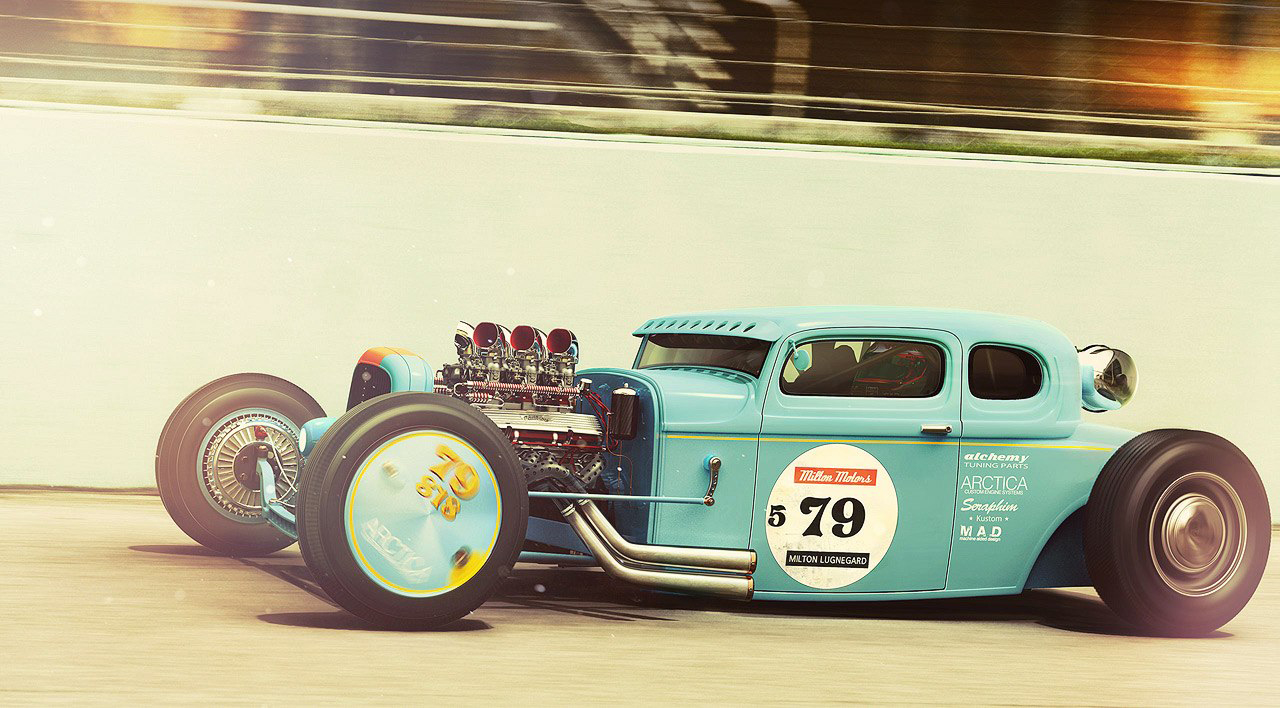
“Flow of parallel modeling and rendering”


Simon mostly uses Rhino for his 3D modeling and sometimes SolidWorks, but has been influenced over the years with experience in other software, such as animation with Maya and sculpting with FormZ. His process matches the iterative development, complemented with the addition of simplicity to offset and highlight the form and dramatic detail built into his designs. “I work in a fairly speedy process which I call “flow of parallel modeling and rendering”, meaning I work to a specific stage of a CAD model and then render it up (with many views) to get a better sense of the forms, proportions and details, much like building a highly detailed prototype. (I really like to get inside it all.) Then, I wind up with a progressive series of CAD models and corresponding images. It’s a complex world that I like to build from a simple start: “Start simple and add more and more simplicity”, ending up with a fair and satisfying degree of complexity. The combination of Rhino and KeyShot allows me to suggest a clean, colorful, energetic, pristine new world where nothing is old and beaten up. And, KeyShot really helps to keep it clean and fresh.”


Pure Creative Process

With KeyShot, you can begin on an elementary level and progress rapidly, resulting with very sophisticated effects. It takes an awful lot of model complexity to bog down KeyShot… it holds up so well it’s downright phenomenal.”

Simon came across KeyShot when searching for a rendering package to compliment the Industrial Design CAD progression at Wentworth. ”It involved testing and trying many different packages. Ultimately, I was sold on the speed of the set up, the real-time render window, the stability, as well as the reliability and intricacy of the results. With KeyShot, you can begin on an elementary level and progress rapidly, resulting with very sophisticated effects. Also, it takes an awful lot of model complexity to bog down KeyShot, (whereas other programs get overwhelmed with less detail, much more easily); it holds up so well it’s downright phenomenal. And, since we needed a package that would help the students create fabulous images of their designs, and not get them frustrated or stifled by (getting in the way of) the complexity of the interface, KeyShot more than fit the bill and has proven to be a real winner!


The class I teach is CAD and there was no time for self learning the rendering component. KeyShot was perfectly suited to the (job) class: painless to pick up; simple to set up; and a wonderful aid to creating beautiful, visual output with extraordinary results. As with any design professionals, the students needed to focus on the process of designing products rather than obsess over the workings of a rendering tool. In other words, the program needed to support the agenda and not get in the way of their creative process. KeyShot does just that, and, so much more.”


Along with that, he has found KeyShot to be a tremendous value in terms of saving time setting up the image, due to the simplicity of the procedural workflows. “Personally, after dragging the model into the live preview frame and applying some standard materials and textures, and deciding on the environment, most of the work is already done. Passing this on to the students becomes very straight forward. The next stage of getting them excited about the possibilities of a quality render is a natural outcome. It’s the “Pow” factor. Exploiting all that KeyShot has to offer, it’s then time to go deeper with the final adjustments, like material and environment creation and editing, camera settings and lens effects. We have a massive, 24 CPU Mac – and I love to test the possibilities, set up very complex images, pump up the pixels, set the max time to multiple days and let it go. Then, when I come back after a long weekend, it’s like magic, the “Pow!””


With Simon being a Professor, we couldn’t help but ask if he had any advice for Industrial designers or tips on using KeyShot. “It’s difficult to keep it to just one piece of advice. Here’s what I tell my students: Keep practicing – (seems obvious), and look at all the fabulous images out there for inspiration! Focus on composition; imagine that everything you are modeling and rendering really exists; and envisage that you are physically setting up an actual photograph. Use the material templates to save time when correcting or making adjustments to a model before you re-import and rely heavily on the render queue feature. Give each image plenty of times to render: don’t undercook! And, set up multiple renders the very last thing at night; then, go to bed, and wake up to witness the magic!”


You can find out more on the Behance portfolio Wentworth Institute of Technology Department of Industrial Design program at WIT.edu. You can find more work from Simon on his Behance Portfolio.


KeyShot Now Available with PTC Creo 2.0 Academic Edition

KeyShot Now Available with PTC Creo 2.0 Academic Edition


Luxion已經與 PTC合作,使 KeyShot 與 PTC Creo 2.0 教育版Bundle在一起。可以在大學畢業後,方便建模和創建美麗圖像。


Great news for students and faculty floating in the glorious knowledge-secreting ether of academia. We’ve partnered with PTC to bring KeyShot bundled together with PTC Creo 2.0 Academic Edition. Yes, for the price of a text book you’ll use as a monitor stand after college, you can be modeling and creating beautiful images with realism that makes 5 out of 5 psychiatrist give themselves shock therapy and a healthy dose of Lorazepam at the sight. Here are more details and how to get it your hands on it.

KeyShot and PTC Creo 2.0
如果您是 PTC Creo 使用者,你知道 Luxion 是第一次與PTC產品集成的軟體發展夥伴之一。我們開發了一個 KeyShot 外掛程式程式,將此外掛程式,您可以您的 3D CAD 模型從 PTC Creo 直接匯入 KeyShot 與裝配結構和材料完好無損。
The Creo + KeyShot bundle comes with the full version of both products – PTC Creo with all apps and extensions, including Creo Parametric and Creo Direct, and KeyShot 3 with Animation and KeyShotVR. The license is a 1-year term license with no software expiration.


2013年1月8日 星期二

Who is using KeyShot-Mikael Lugnegård / Lugnegård Design

Who is using KeyShot-Mikael Lugnegård / Lugnegård Design


當圖像所溢繪製在你的情緒時,你知道建立者可以完美地捕獲設計的精髓。這正是麥克爾 Lugnegård 有能力。麥克爾是令人難以置信數位演出者來自瑞典、 開發設計思想和概念使用 KeyShot 作為他商標呈現過程的一部分。他酷愛汽車運輸設計,創建成分和用戶端的視覺化檢視,這種紅、 cmiVFX、 斯堪尼亞卡車和許多其他。我們與麥克爾談他的熱情,他的過程,並瞭解更多有關他如何使用 KeyShot。
Mikael Lugnegård / Lugnegård Design
Modeling software used:
Maya / modo
麥克爾一直以不同的方式表達他的創作激情。"創造力是我的關鍵,它使我快樂,它激發我,它讓我推我的技能和工作樂趣!"麥克爾說,"我認為這是我為什麼喜歡 KeyShot 這麼多的原因之一。它讓我有創意!"

KeyShot 3D Rendering

沒過多久他決定繼續應用他渴望創建方法。"大約在 10 年前我讀一篇名為拉爾斯 · 福爾克 (現在在沃爾沃汽車) 瑞典設計器中調用表單的瑞典設計 》 雜誌,"我想這聽起來非常令人興奮,於是,調查什麼工業設計是所有關于。"從那裡,麥克爾開始他在瑞典的 UID 的研究。"我的主要興趣不解決問題或創新。它是表單、 通信和發展觀。"這使我更多地概念設計 & 概念藝術比入工業設計。我愛使圖像,創建視覺效果真的流行,並使您停止並有一個更看。""我的熱情是設計和圖像的一個故事。它其實並不重要什麼並非如此。
麥克爾告訴我們更多有關他用來創建圖像的他 79 Coupe 的過程。他的攝影背景方面發揮重要作用,他如何捕獲該車輛。"我做了大量的攝影和它可能是酷內 KeyShot 相似的方式工作的思想。我最終 KeyShot 中的相機設置上狹窄的深度的欄位,即敞開的光圈,我佳能系統一樣使用同一固定的焦距。"

KeyShot 3D Rendering

KeyShot has made a huge difference to my workflow by making it far more intuitive and creative.”
麥克爾決定 KeyShot 的幾個原因。"KeyShot 是穩定、 快速、 非常容易 !我愛速度 !即時合作的好處是巨大的 !正是這種好的方法來快速地評估您的設計和更好瞭解如何它正在。老實說,沒有太多可供選擇的我們運行 Mac 那些想即時渲染這些。肯定的是,KeyShot 效果極好創建令人敬畏的瑪雅和 modo 模型、 圖像,但我想即時渲染器的好處,測試不同的照明鑽機和材料組合的時候。在這裡,我覺得 KeyShot 是非常快速和方便使用者使用。我很長時間在 KeyShot 工作,不能看到我如何管理沒有它。"


"KeyShot 已提出對我的工作流的巨大差異的使它更加直觀和創造性。威力在於簡單和大量的預設。良好效果圖是時間調整、 很好的參考材料和有趣的結果。KeyShot 是有趣的但是很強大 !讓我快速地進行工作,我可以嘗試的想法非常迅速,在很短的時間創造了大量的材料。這觸發了我的創作和磨練我的眼睛。我還看到和知道我會節省時間我推"呈現"之前。我通常只運行呈現作業時使用的自由度 (域深度) 或放射材質。否則即時渲染視圖做這份工作就好。"
"它是非常重要,我不會受到我的軟體。KeyShot 是截然相反。自由度是一如以往一樣容易,標籤是顯而易見,材料預設是高 quality–the 不勝枚舉。所有這一切在一起幫我提高品質和完成我的工作,從而更快樂的客戶和更多的工作。""我不知道如果我呈現過程今天要快得多,但它肯定是更好和更具創意與多更強有力的結果。"

KeyShot 3D Rendering